
Omniablok benefits
MINIMUM FASTENING MAXIMUM BENEFIT
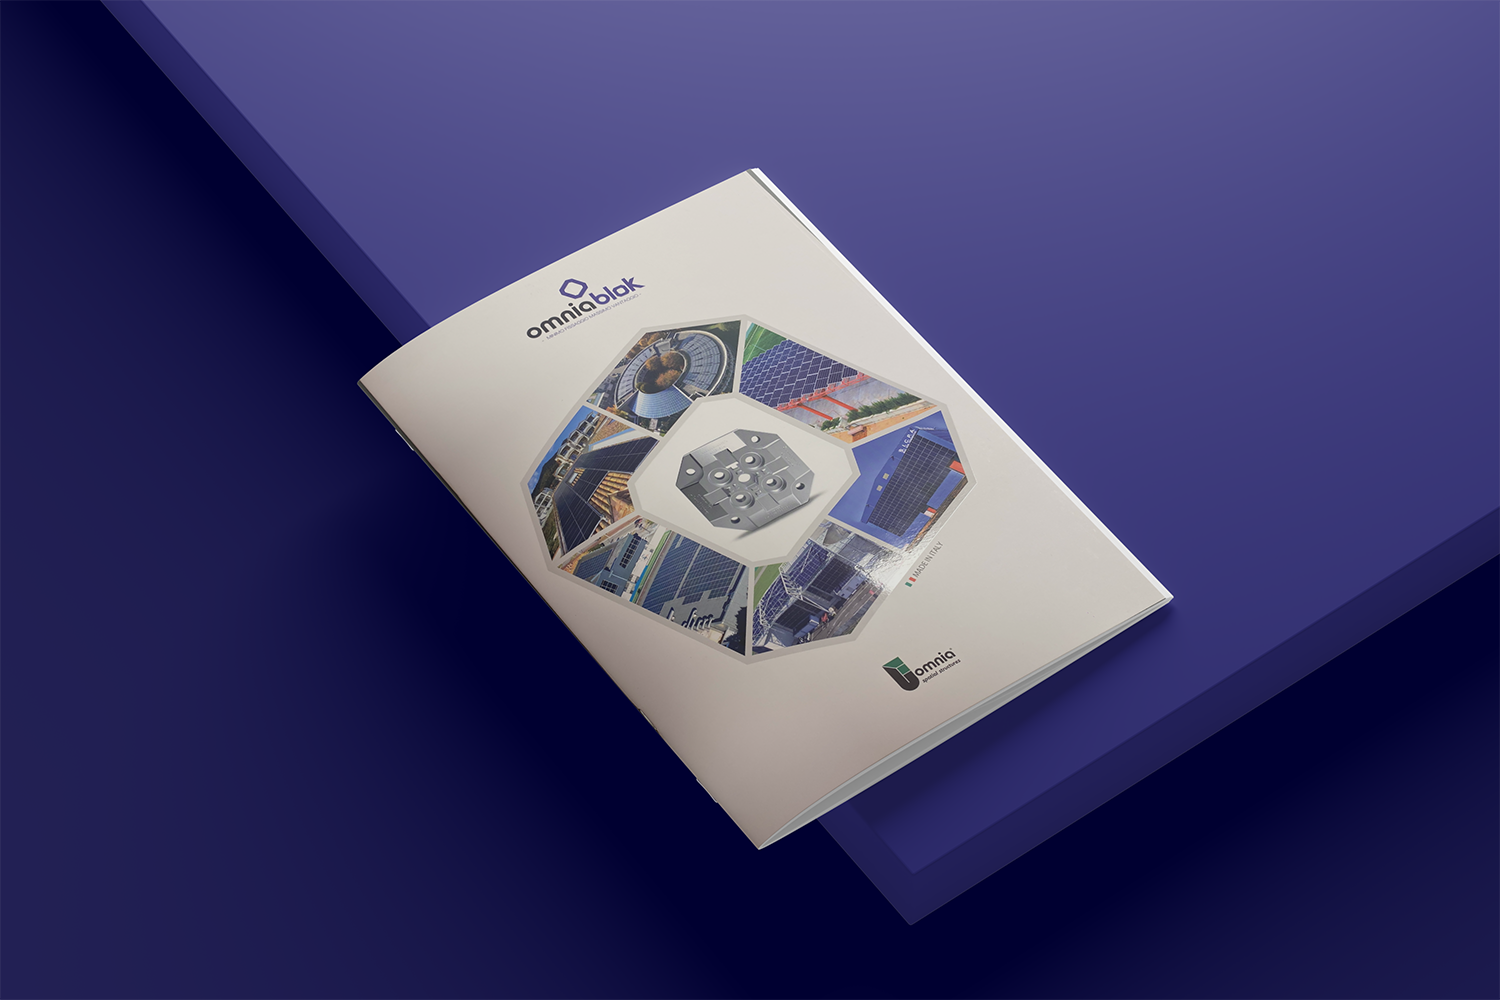
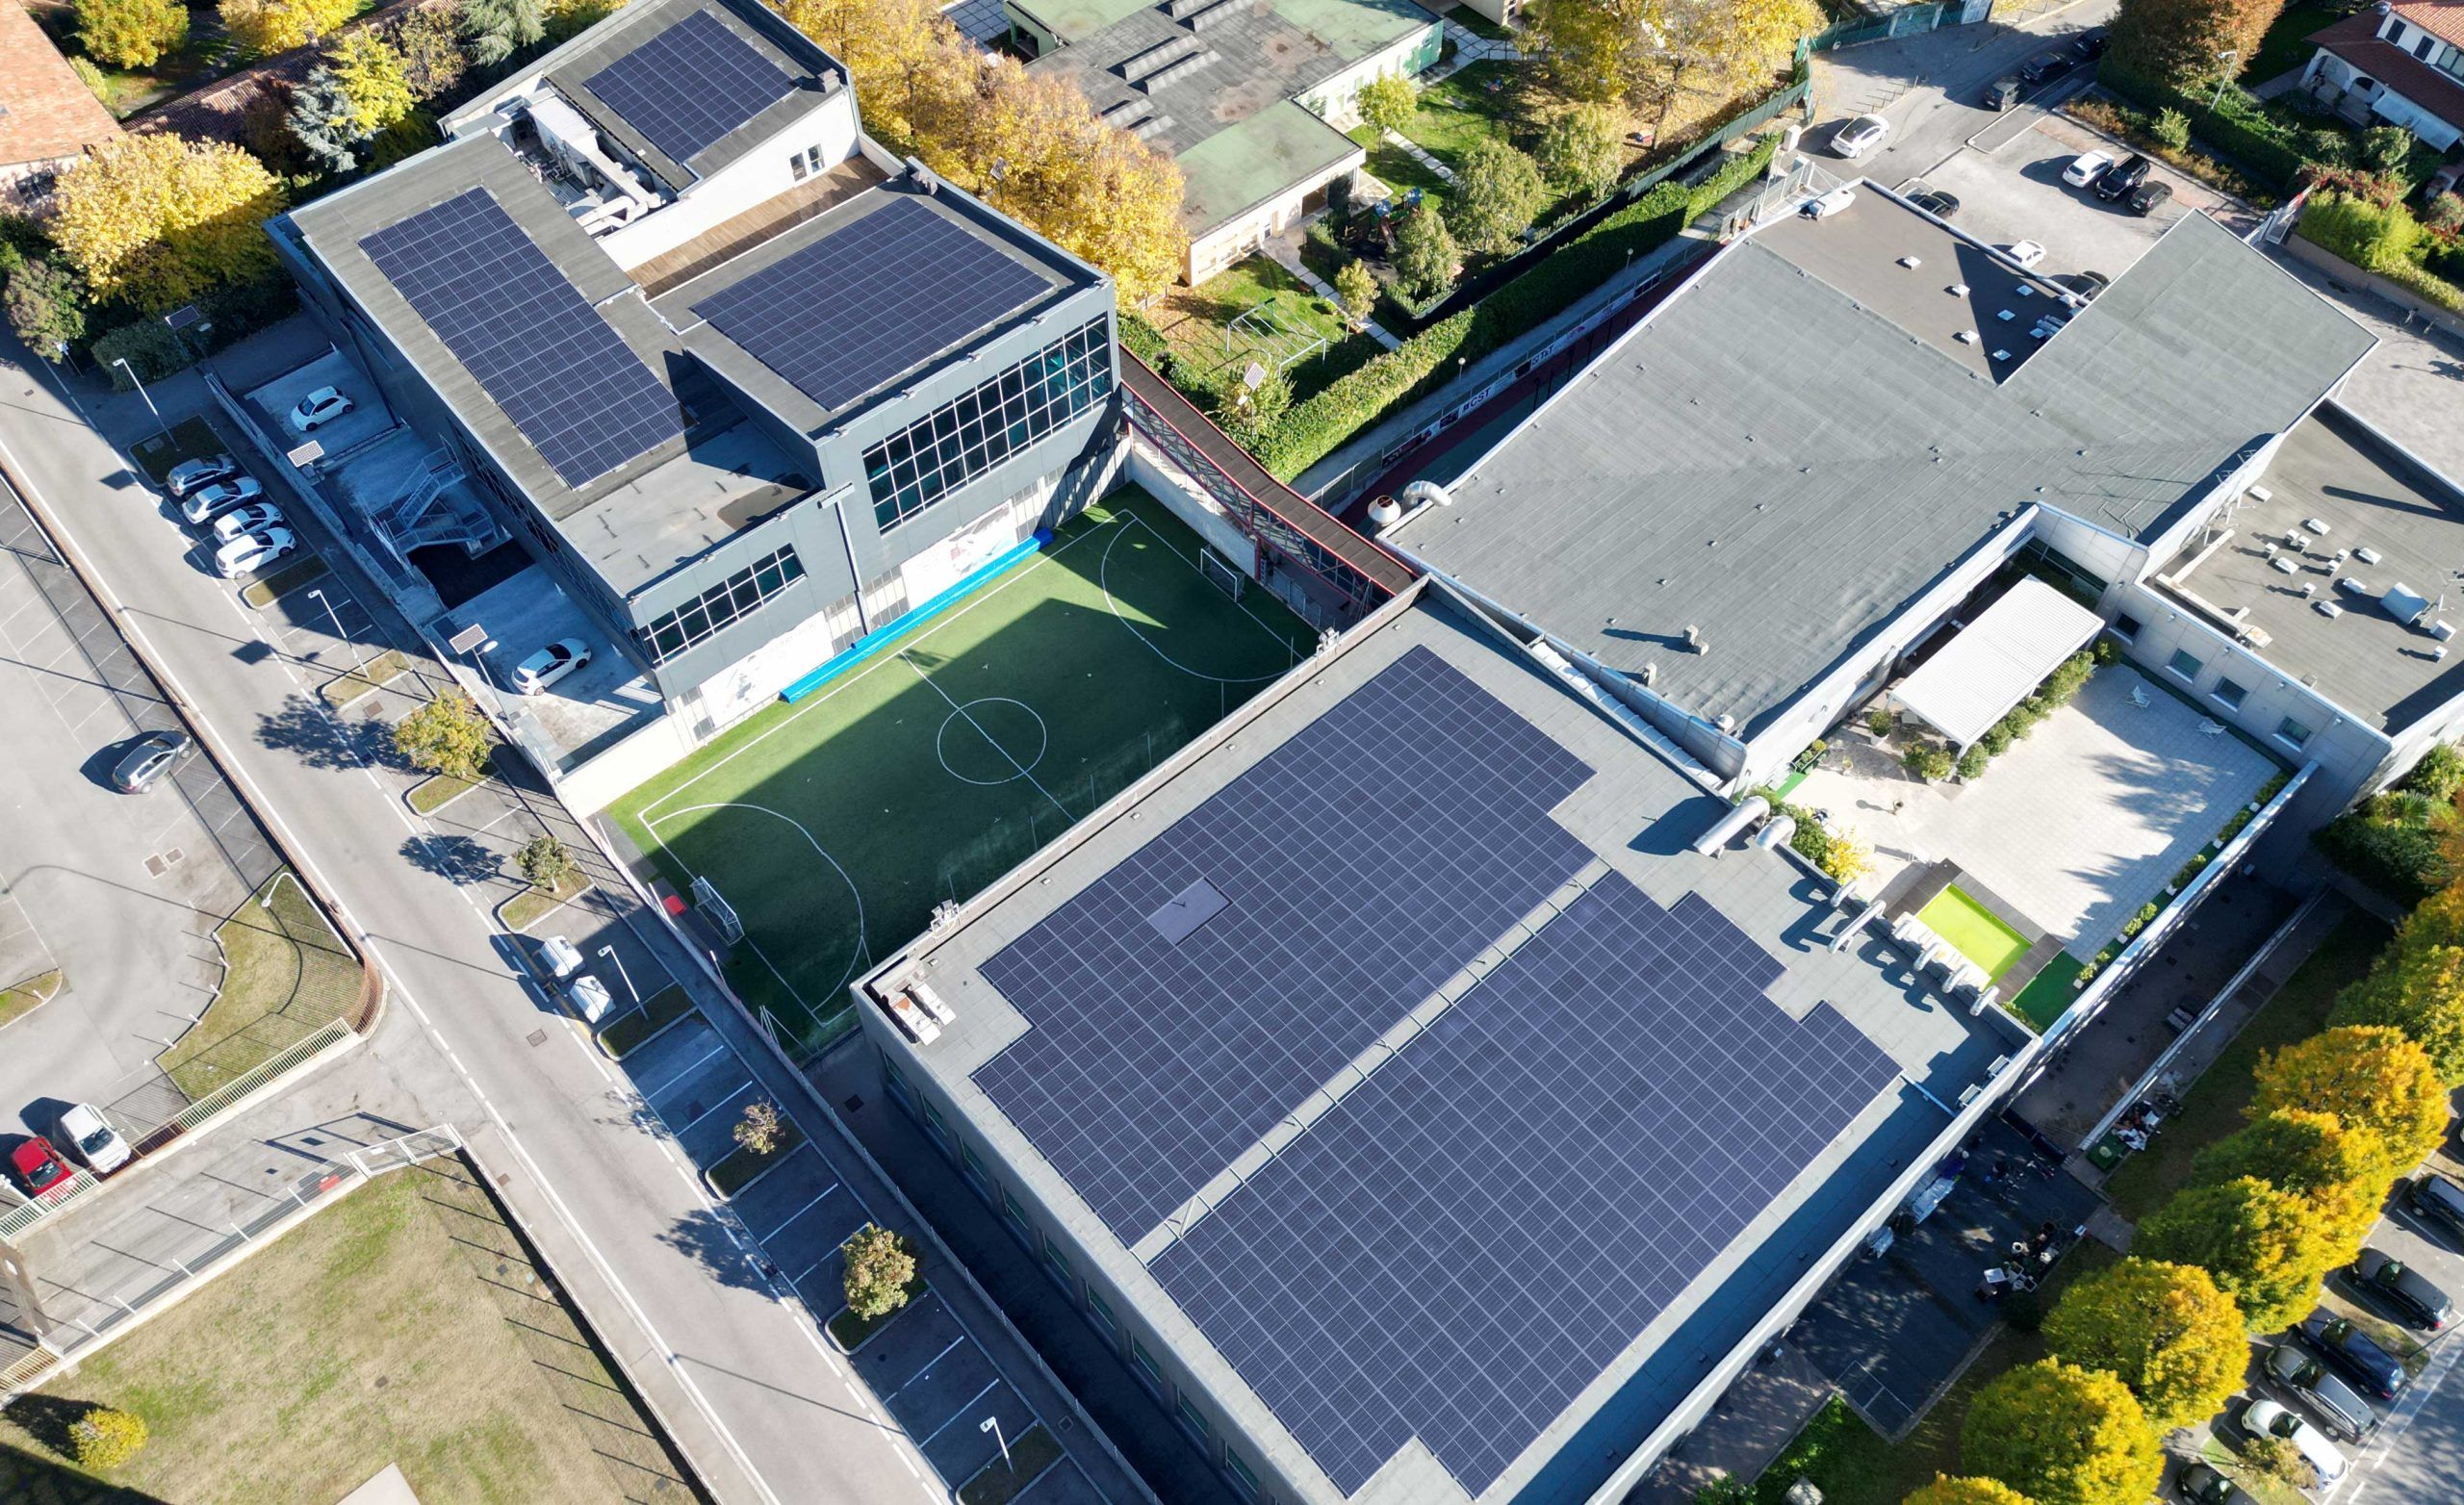
The system for roof and impossible installations
Discover all the advantages of our structure for photovoltaic solar panels.


Explore our projects
Discover how our Omniablok has been featured across a wide range of large-scale projects
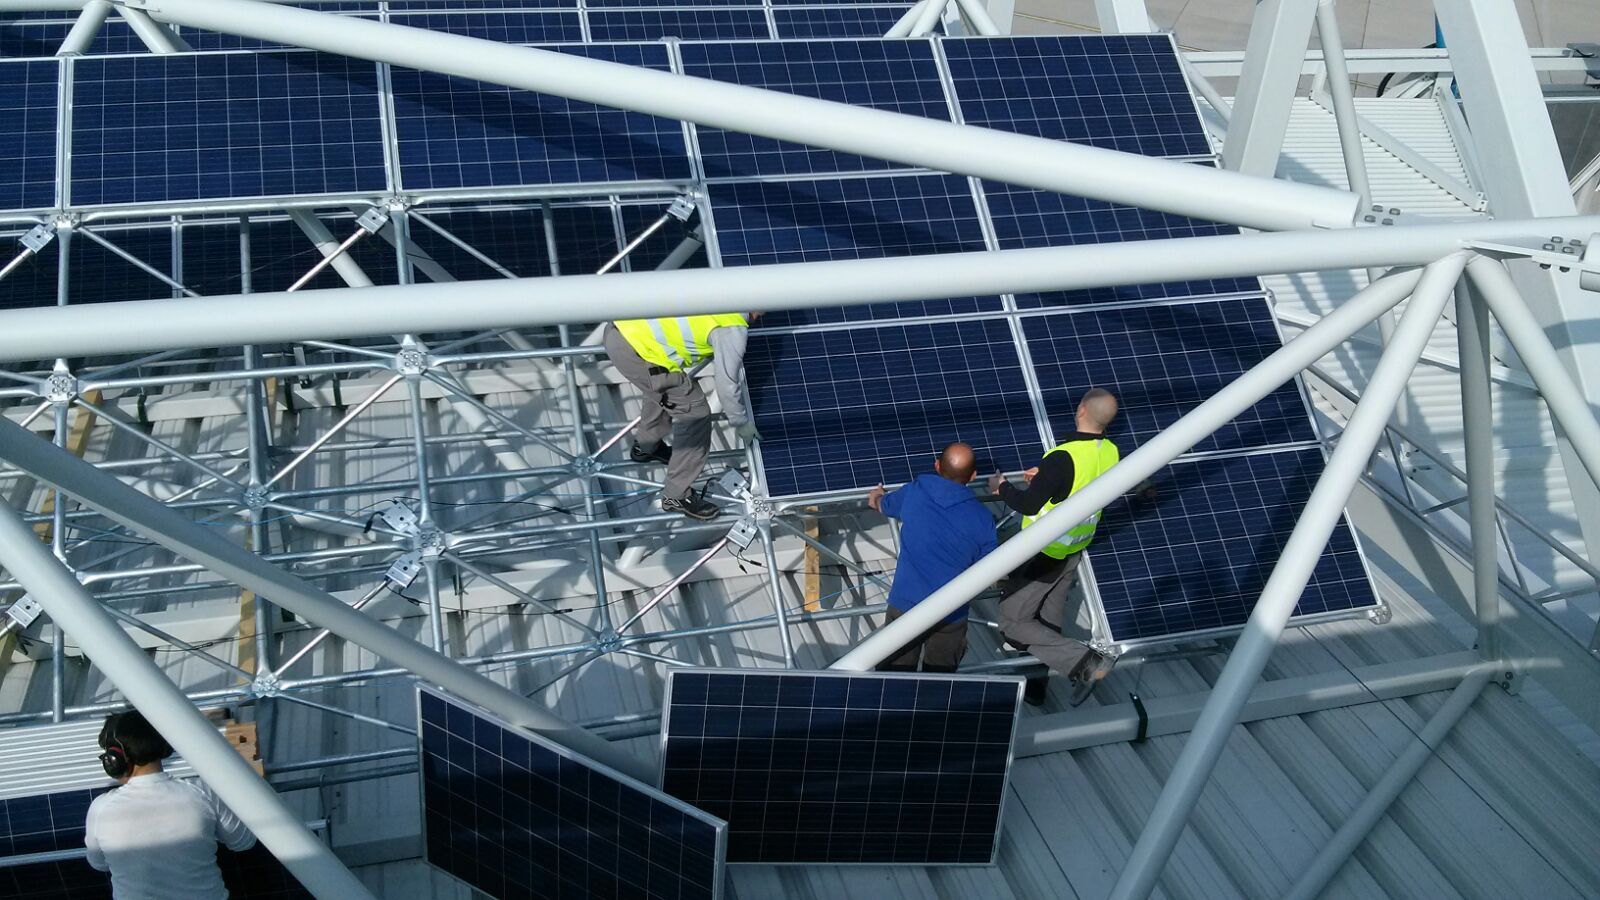
Assembly in three simple steps
The design of Omniablok aims to streamline installation times
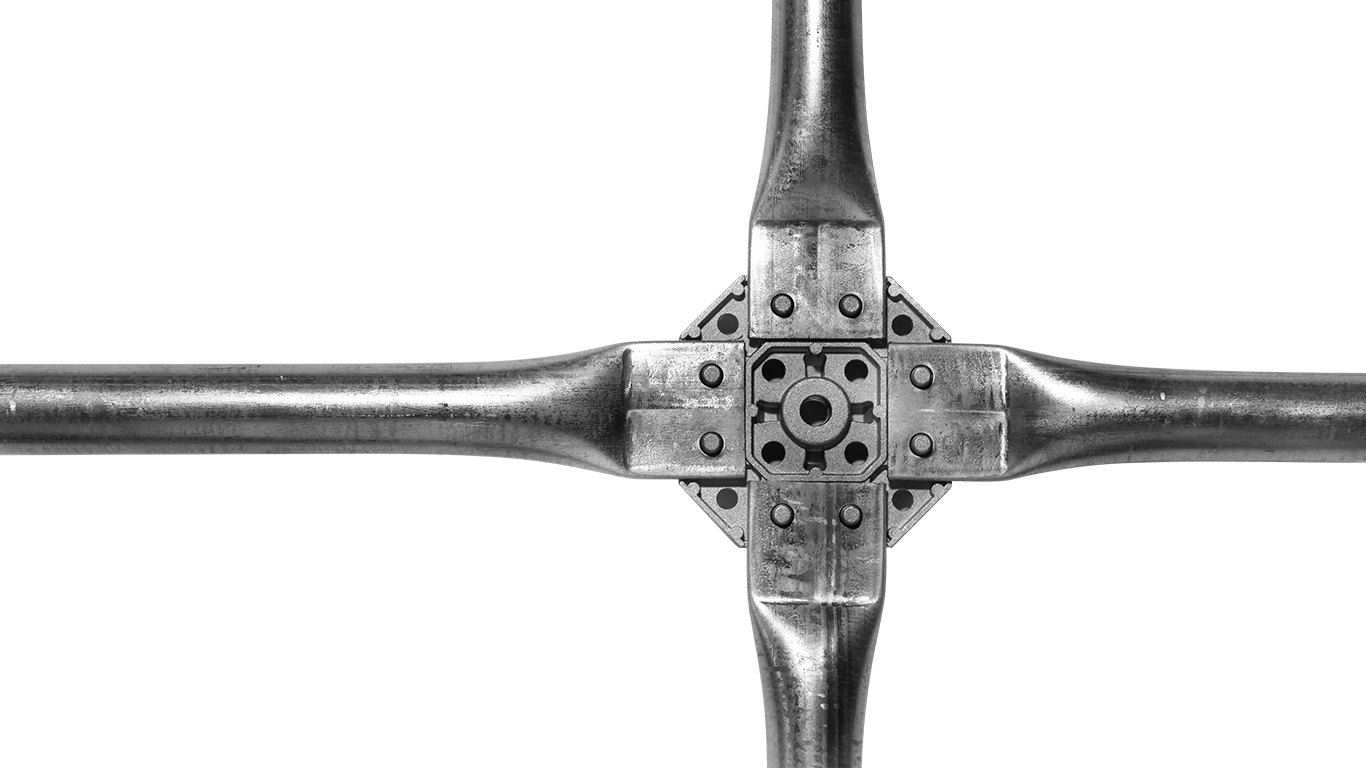
Step 1
Module Placement
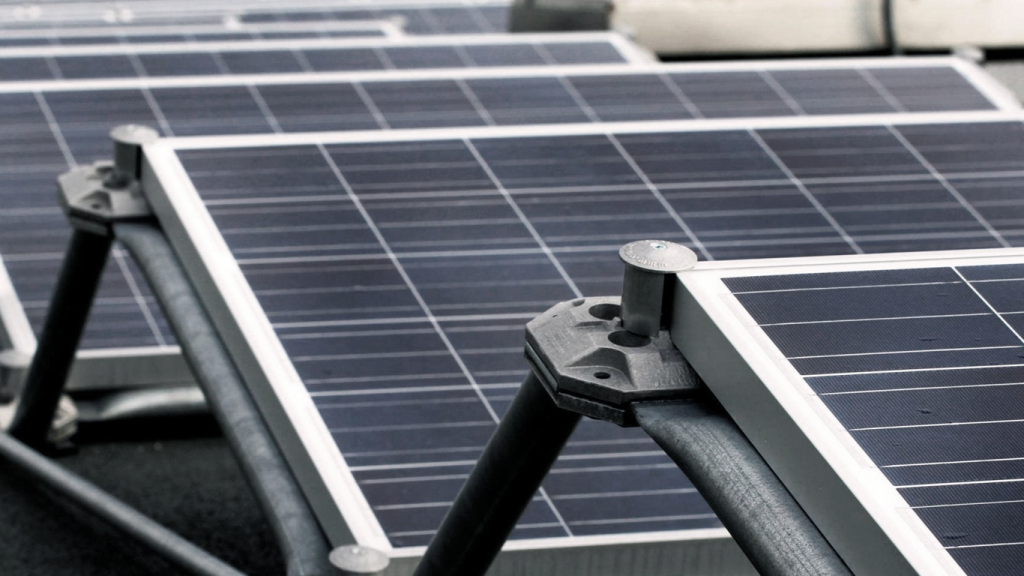
Position the male Omniablok casting onto the roof surface, then place the grid element steel tube
The Omniablok casting has been engineered for easy installation, allowing swift and precise positioning of components right from the initial setup
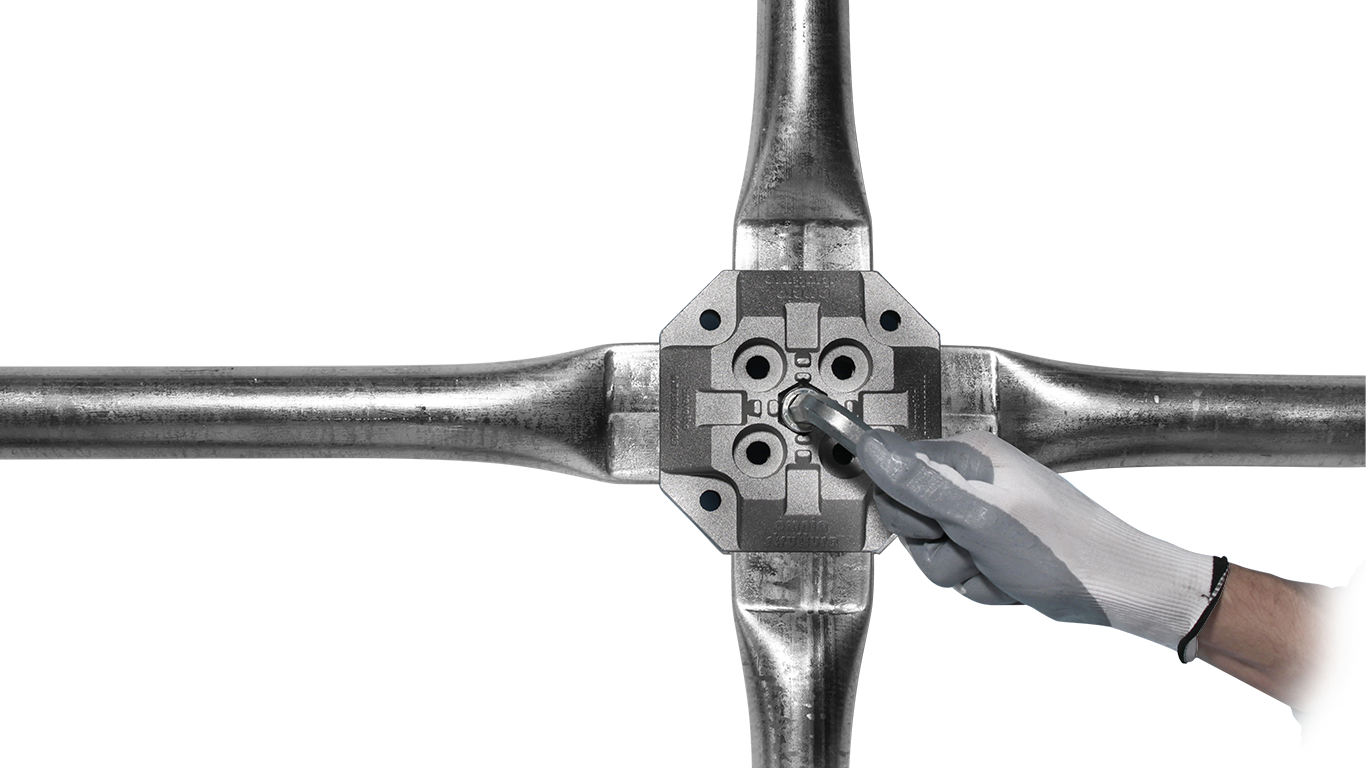
Step 2
Fastening the module
Position the female Omniablok casting in alignment with the male casting, then secure it using the central M16 screw.
The locking mechanism is facilitated by a single central screw. The design of the casting and grid ensures a stable and durable node, capable of withstanding stress.
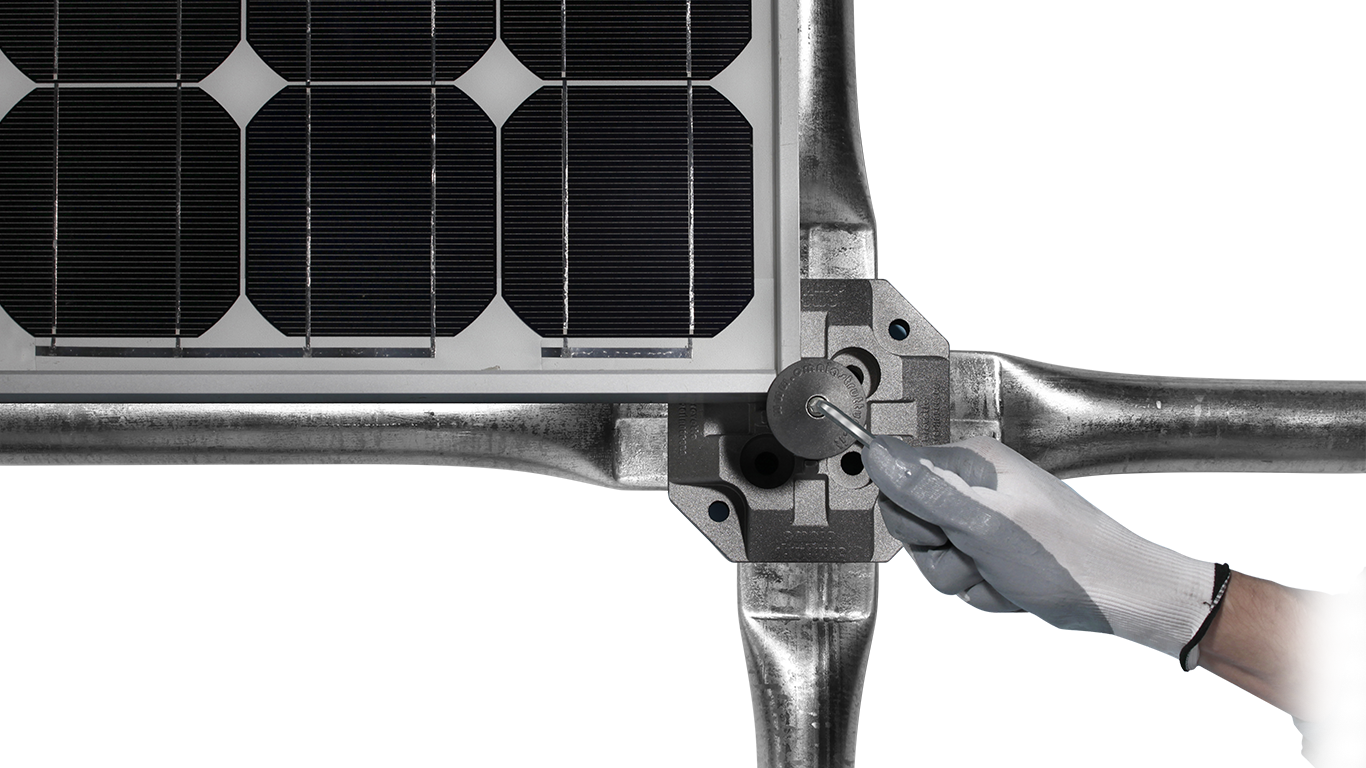
Step 3
Panel Placement
Position on the panel on the grid support, then secure it using the panel stopper washer.
The groove designed in the casting and the panel stopper washer ensure the panel stays in place facilitating both the installation and potential maintenance tasks.
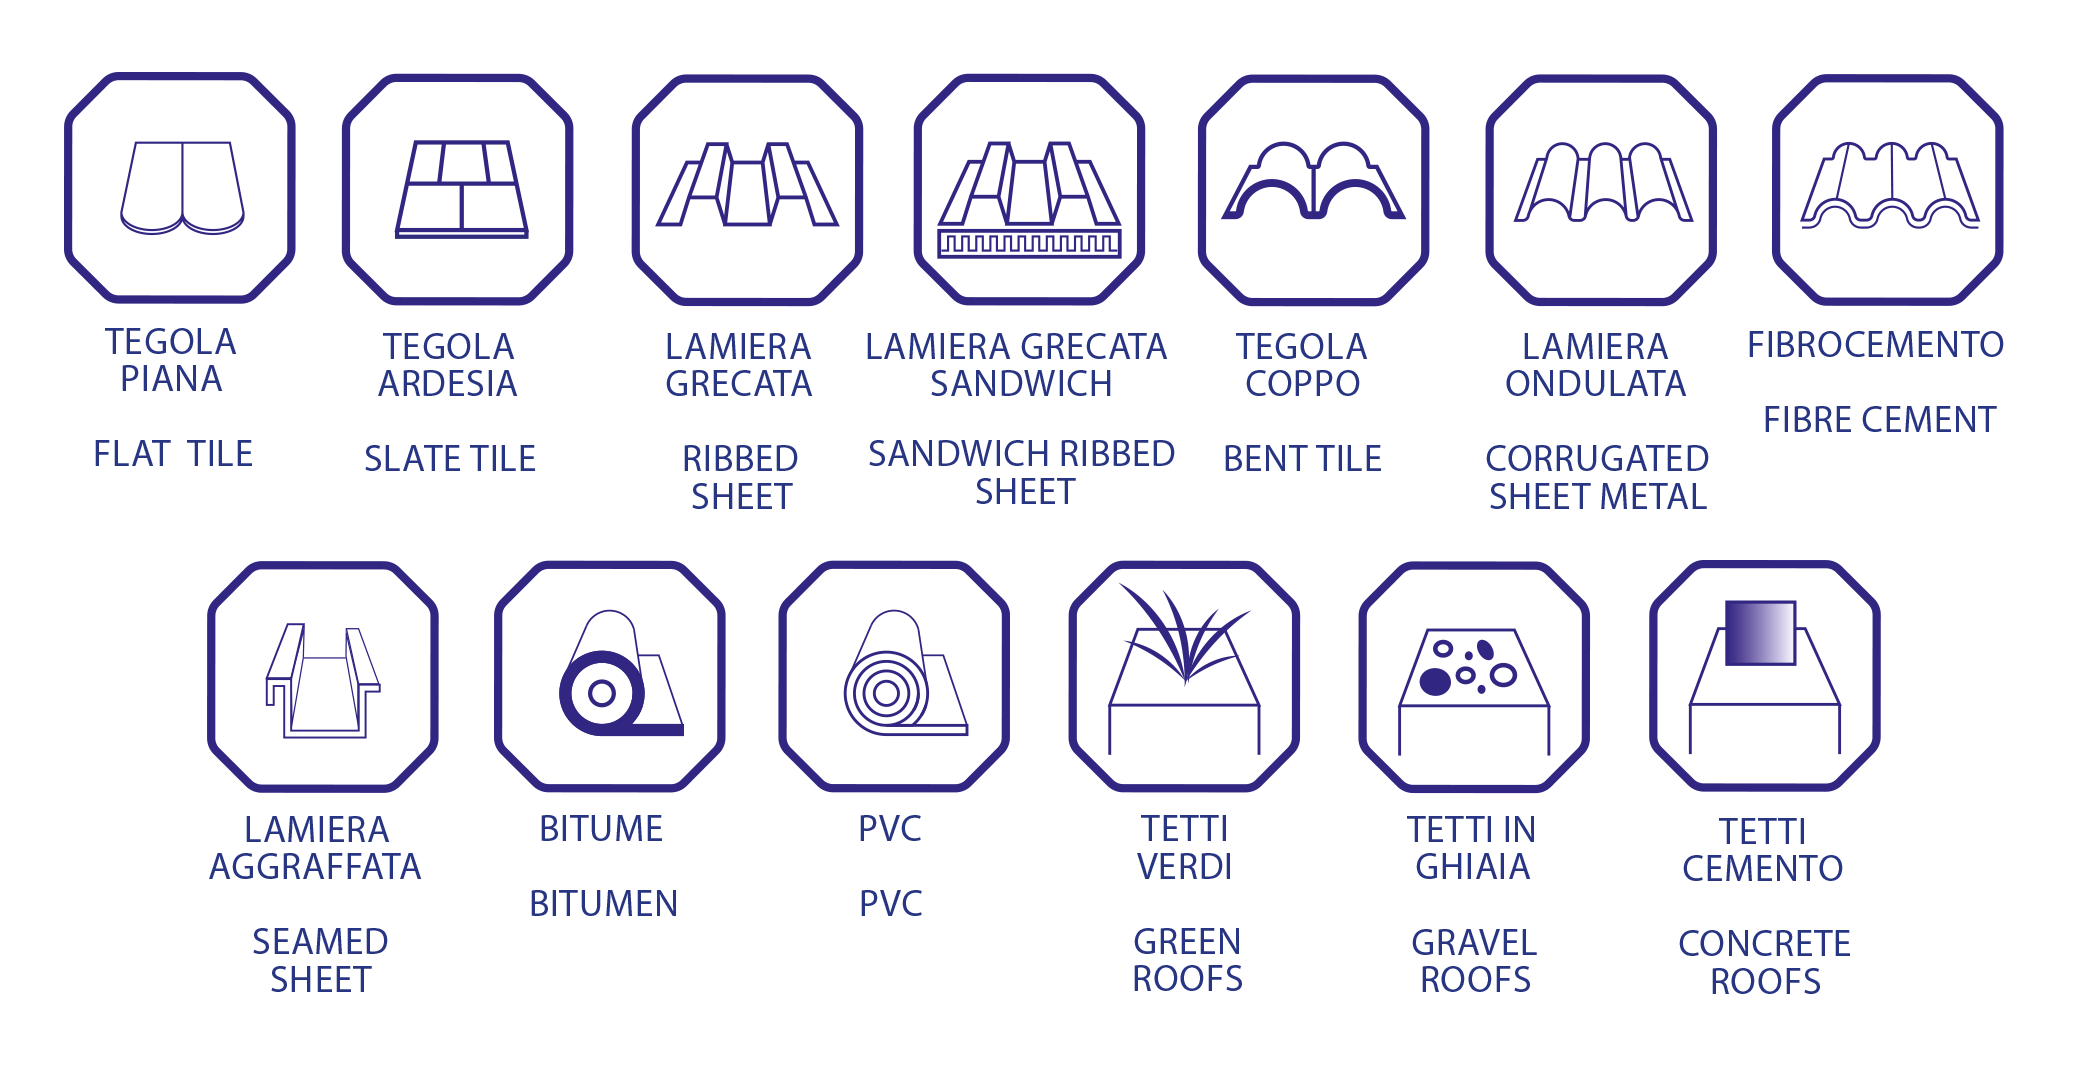
A solution applicable to all construction materials
The modularity combined with the customized nature of our product makes it a versatile module suitable for various shapes and surfaces.
Download Catalogues